Friday Night Photos: Garden Renovations and a New Shed for a Better Garden in 2011!
I love my garden, a source of homegrown food and herbs for me every summer. Over the years the garden has expanded with raised beds, and beds by my new deck for tomatoes. But even with these upgrades, the main garden was hard to maintain, due to overhead sprinklers that watered all the dirt as well as the beds. I also had nowhere to store tools, since I don’t have a garage. I had some green James Hardie siding left from the house renovations last year, so in early November I started a project to improve the garden and build a shed for tools.
(Warning, there are a lot of photos in this post. I’m not sure anyone is really *this* interested in my garden, but I like documenting it so I can remember how it’s changed.)
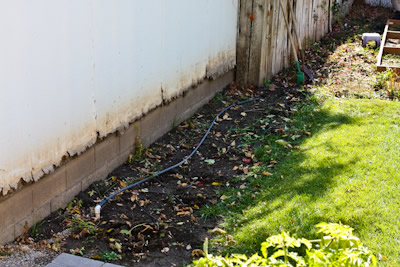
I wanted a shed without losing any garden space, and decided to use this strip of dirt along my neighbor’s garage where I’d grown various things through the years.
The project quickly expanded, as these things always do. When I thought about a project to improve the garden, right away I realized I should replace the old wooden fence on the left. (In front of the fence is the new triple bed for the herbs that previously had been growing along the fence.)
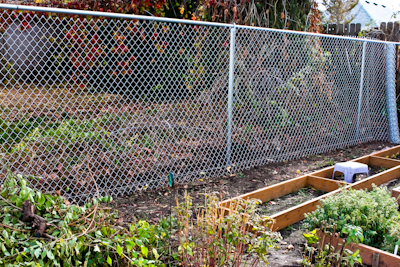
The contractor who did my house renovations put a chain link fence with white slats along that side of the yard, matching it to the rest of the fence all around my yard.
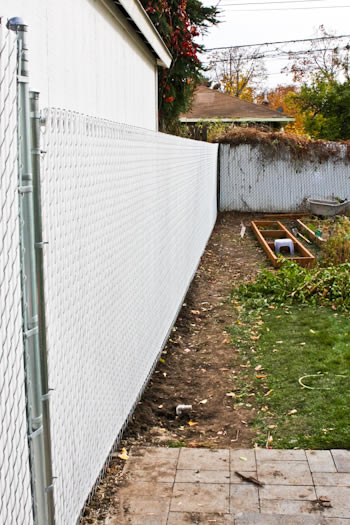
Here’s the whole strip of new fence, which also covers up the garage, which was pretty unsightly. The path shown in this photo is right where the door of the shed is going to be.
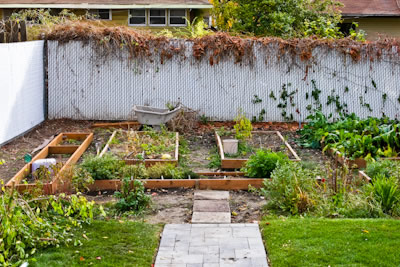
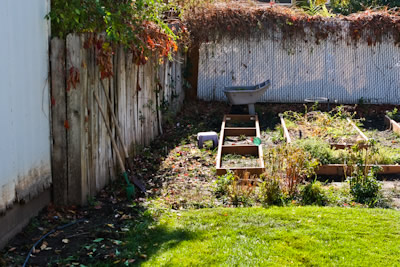
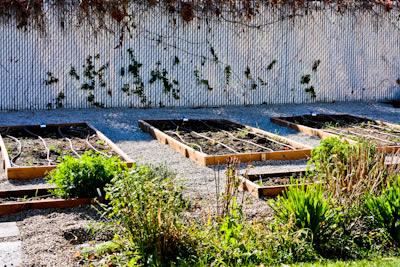
Here’s a “before” shot of the garden itself. I had to pull out most of the weeds so we could put weed barrier and gravel around the beds, but during the summer there were weeds everywhere!

Both contractors were working at the same time, so next I got a cement pad that would be the floor of the new shed.
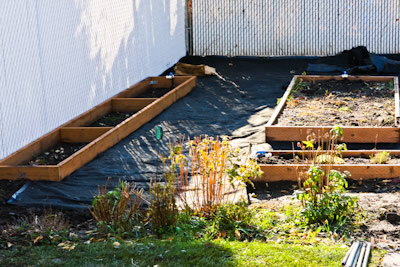
This photo shows the new herb bed moved into place next to the new fence, and the beginning of the weed barrier placed around the beds.
Here’s another shot that shows the black weed barrier all in place and about half the gravel spread over it.

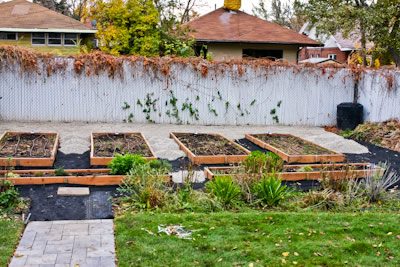
Finally, the finished view of the garden beds with the weed barrier and gravel all around them.
And best of all, each raised bed now has it’s own drip sprinklers that water only the surface of that bed. I can even turn off the water to certain beds if they aren’t planted yet or need less water.
Meanwhile, the frame of the new shed is going up on top of the cement floor.

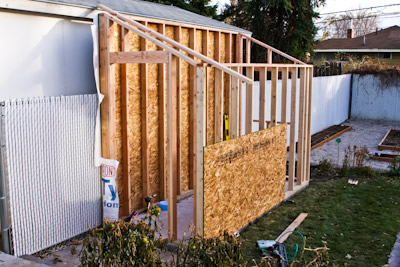
A little later that day the walls are up on the shed.

Now we have a door, a window, a roof, and some weather-proofing material that goes under the siding.
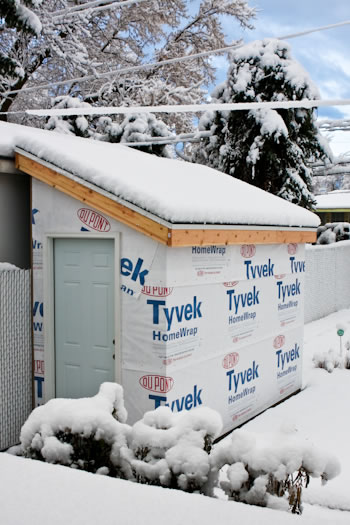
Unfortunately at this point mother nature stopped cooperating for a few days.
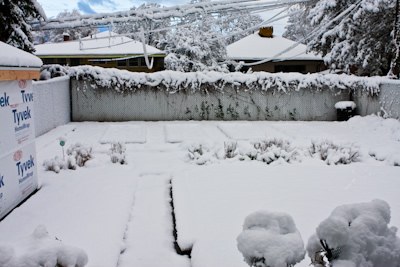
I was definitely sad to have a new and improved garden and have it be completely covered by snow.
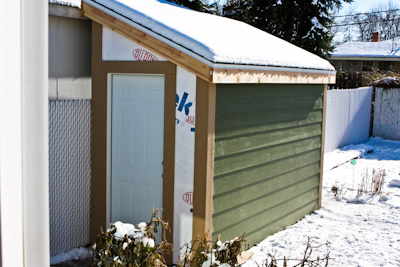
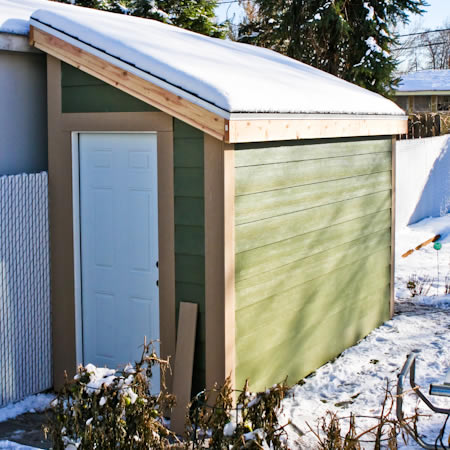
After it warmed up a bit and some of the snow melted, Spencer got back to work on siding for the shed.
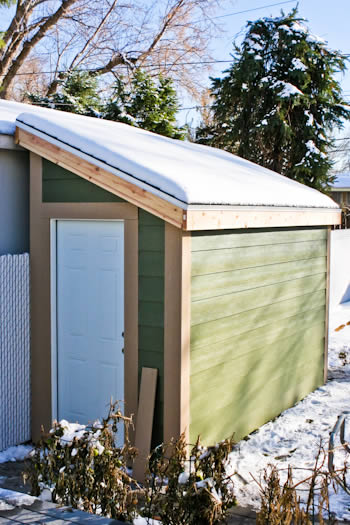
And here’s how far we’ve gotten on the shed. You can’t see them but my tools, garden supplies, and a few other things are already stored inside. Eventually the rest of the trim will be attached and then the trim will be painted white to match my green and white house.
Next summer I think I’m going to love my garden even more! Thanks to the great contractors who did such skillful work on this project.
Fence, Shed Project and New Herb Bed:
Spencer Young, STL Services
801-836-0322
801-836-0322
Garden Sprinklers, Weed Barrier, and Gravel
Turfco Western Sprinklers
801-571-3418
Email This Recipe To Me!
We are a participant in the Amazon Services LLC Associates Program, an affiliate advertising program designed to provide a means for us to earn fees by linking to Amazon.com and affiliated sites. As an Amazon Associate, I earn from qualifying purchases.
21 Comments on “Friday Night Photos: Garden Renovations and a New Shed for a Better Garden in 2011!”
There are occasional weeds that grow up through the rocks, but not many. It is much easier to keep weeded than before!
Your yard looks great!! Do you find the weeds growing back in despite the weed barrier in the rocks now, or are they still pretty clean?
Oh, I love your garden beds and seeing the progress. We built beds for our spring planting and the whole garden is so much more organized than in past years. We also have the drip irrigation and love it. Plans are in mind for a shed but hasn't happened yet. And next, I want to start composting. I can related to how much you love your garden.
Dara, I'm definitely hoping for very minimal weeding!
You are going to love the weed barrier and rocks, Kalyn. Hopefully that will make your weeding time almost non-existent. The shed is wonderful!
Wendy, that does sound a bit scary! I'm not sure if the weed barrier will keep away insects, but I think it might help. Glad you liked it.
I really enjoyed seeing your garden and shed and how you did it all. My garden is a MESS! I need to learn how to control weeds and would love a new shed. We live in NC and our shed is overrun with black widows that have made their way to our garden. I attempted to weed last year with my kids and we found a whole bunch of black widows after a rain we had. Now we are all scared to even go out there to do much of anything gardenwise.
Hi Kalyn! The contractors really did a good job! Wow, I love that little green shed and with snow on top its picture perfect! Looking forward for your gardening pictures on spring.
Nati, thanks for letting me know that. Today the snow has mostly melted, so I'm hoping we don't have a big storm again for a while!
As usual, i always enjoy reading your blog. So happy for you. Garden, shed, house all look warm to me, even under the snow. Hugs! …..Nati
Christine, you can have all the snow as far as I'm concerned!
Not too many photos at all. I like the documentation. And, I'd be delighted if it would snow here (just once a winter) like it does in your backyard! 🙂
CJ I had originally planned to make that shed a shed/greenhouse combination and even had it all planned out with my contractor. However, after observing that spot in the spring this year, I realized that there wasn't enough sun there to be worth investing in a greenhouse. So I think no greenhouse is in the plans for me. Luckily I have a brother-in-law with a great greenhouse who gives me some tomato plants, and there are two wonderful garden centers near my house where I get most of my plants.
Wowie! That looks fantastic! No more muddy boots. Great idea to locate the shed like that too. Bet you can't wait until spring!
So what's next? A greenhouse? 😉
Thanks everyone; I do love my new little shed. (And love getting those garden tools out of the "mud room" and turning those cupboards into a pantry too.) I agree, Spring 2001 will be great!
Great garden and a perfect little shed! You'll love it this next growing season 🙂
Oh, what a beautiful garden space – and a SHED to go with it! What a joyful Spring it will be for you in 2011!
Wow, Kalyn it is so cute. I haven't see a shed with personality before.
Kalyn,
I loved reading this entire post. You could even turn it into a little "video slide show" type thing. Jaden presented one of those at Blgoher Food this past fall and it was very good.
Miss you and hope to see you again soon,
Elana
Lydia, you shouldn't be too envious because you have such a fantastic barn!
Fantastic! I have shed envy.